
Fixing pallets to the ground to create an outdoor terrace requires more technical rigor than it seems. A poorly anchored pallet will warp, squeak, and rot within a few seasons. The following ten tips cover fixation points, ventilation, hardware selection, and surface treatments, based on recent recommendations from ADEME and CAPEB.
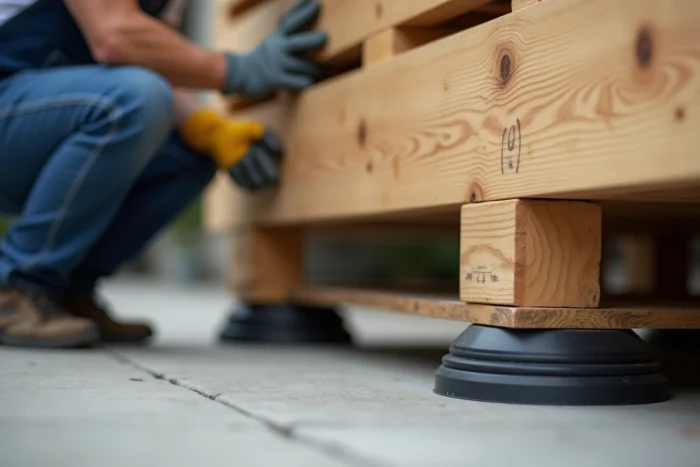
1. Raise the pallets with adjustable anti-vibration pads
See also : Why turn to the CCI? Discover its benefits for your business
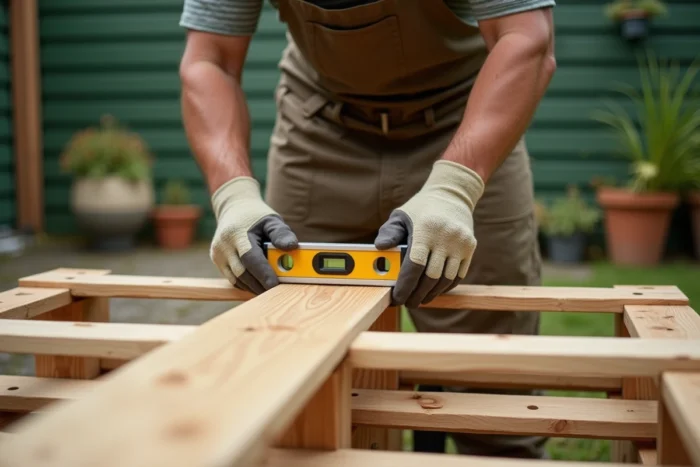
The first instinct is to insert adjustable pads between the ground and the structure. Since 2023, the Jouplast installation guide recommends pads equipped with noise and vibration-dampening heads for pallet terraces. These heads absorb wood movements and eliminate squeaks that appear from the first winter.
An adjustable pad also compensates for ground irregularities without pouring a slab. Place a pad under each load-bearing point of the pallet, at least four for a standard model. Check the leveling with a mason’s rule after each adjustment.
Further reading : How to Choose the Best Air Cooler for Your Home?
2. Maintain an air gap of ten to fifteen centimeters under the structure
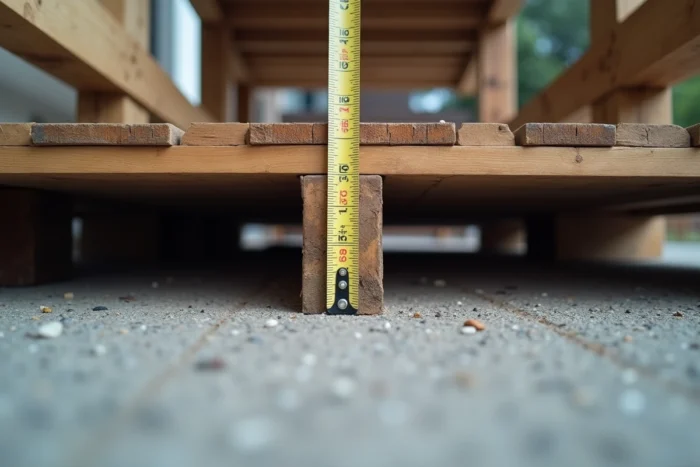
ADEME reported in 2023 an increase in cases of accelerated rot on pallet terraces placed less than ten centimeters off the ground, particularly on clay soils. The note recommends an air gap of at least ten to fifteen centimeters and continuous lateral ventilation for permanent structures.
Placing a pallet directly on the ground or on a bed of gravel that is too fine blocks moisture drainage. The wood remains in prolonged contact with condensation, accelerating the development of wood-decaying fungi. Adjustable pads facilitate compliance with this minimum height. Mastering the techniques for making a pallet terrace primarily involves managing this under-structure ventilation.
3. Anchor the pallets together with galvanized screws
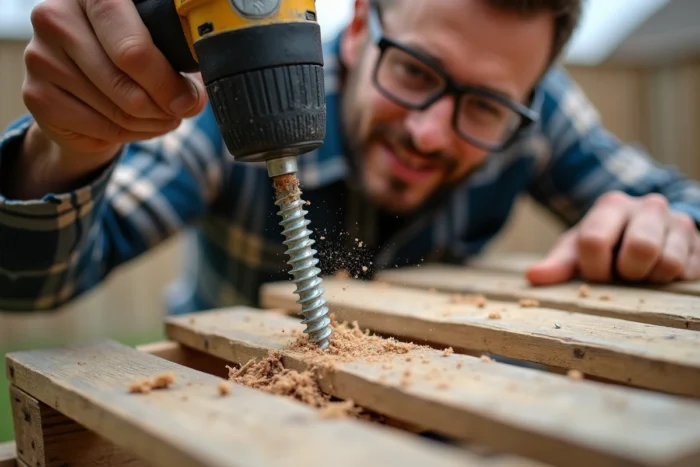
Standard wood screws do not withstand lateral movements of a terrace exposed to the elements for long. Galvanized screws (minimum diameter 8 mm) pass through the pallets’ crossbeams and unite the whole as a rigid floor.
Drill a pilot hole slightly smaller than the screw diameter to avoid splitting the wood. Place two screws per joint, staggered, to distribute the stresses. Galvanization protects the fastening from rust for several years.
4. Install a geotextile fabric under the entire ground surface
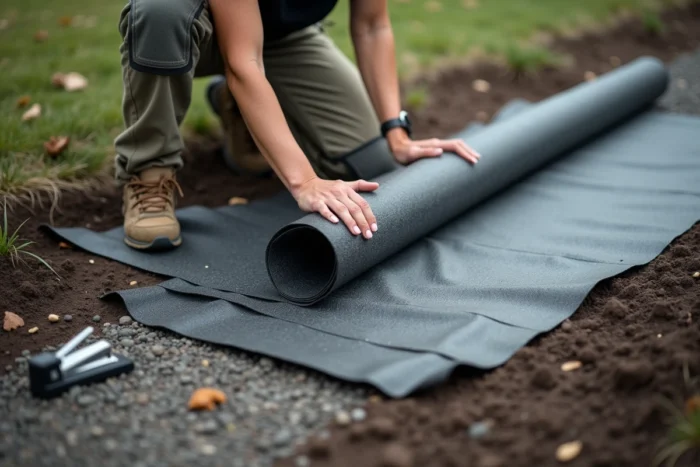
A geotextile laid on raw soil prevents vegetation from rising through the structure. Without this barrier, weeds infiltrate between the slats and gradually lift the pallets.
Choose a fabric with a sufficiently dense weight to resist puncturing from the pads. Allow it to extend a few centimeters beyond the terrace perimeter, then cover the edges with a bed of gravel or soil. This detail prevents the wind from lifting the fabric.
5. Screw metal brackets onto the load-bearing corners
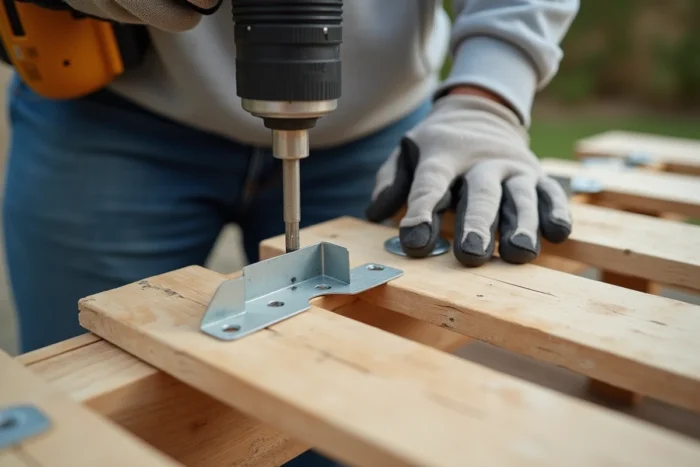
The brackets reinforce the corners, where the pallets experience the most torsion. Attach a stainless steel or galvanized bracket at each junction corner between two adjacent pallets.
Two screws per wing are sufficient if you use short screws. The brackets prevent the gradual spreading caused by the wood’s expansion cycles between summer and winter. On a large terrace, add intermediate brackets every meter.
6. Treat the pallets with a suitable outdoor wood saturator
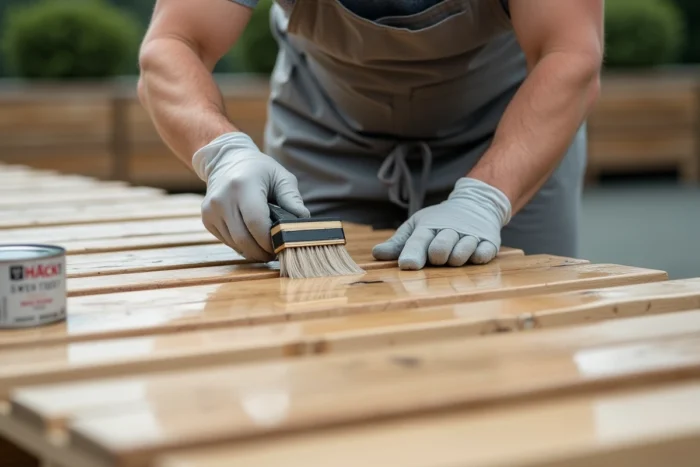
Pallet wood is rarely treated for prolonged outdoor use. A saturator penetrates the fibers and limits water absorption without forming a surface film, preventing flaking.
Apply two coats before installation, focusing on the cut ends and hidden faces. Renew the application every year or as soon as the wood loses its color. The saturator does not replace ventilation under the structure; both protections are complementary.
7. Apply a non-slip treatment on the walking slats
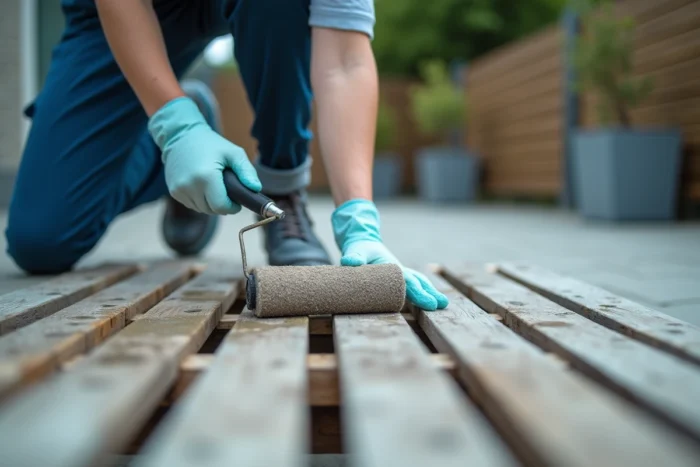
CAPEB updated its recommendations in 2023 to include wood and pallet terraces in situations requiring a systematic non-slip treatment for outdoor surfaces, especially in wet areas or near pools. The owner assumes responsibility in case of a fall on a slippery surface.
Non-slip products come in the form of varnish loaded with microbeads or adhesive strips. The first option offers a more durable result on raw wood. Test the adhesion after complete drying by spraying the surface.
8. Fix the pallets to the concrete floor with hammer-in anchors
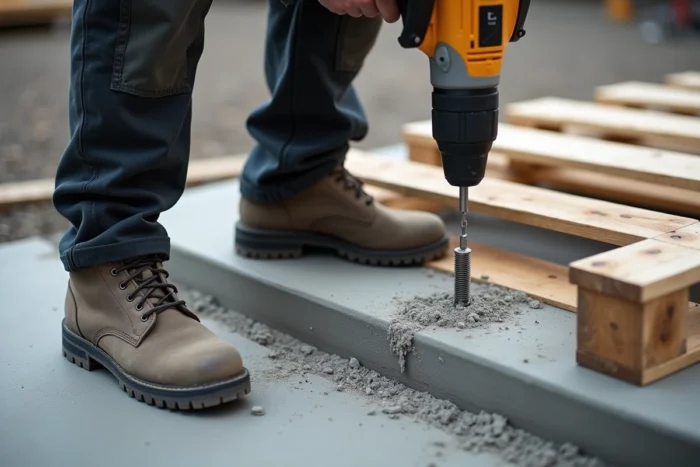
On an existing slab, the steel hammer-in anchor remains the most reliable fastening. Drill through the pallet and slab in one go with a concrete drill bit, then drive in the anchor with a hammer.
Four anchors per pallet ensure sufficient hold against wind uplift. Place them at the four corners of each pallet, about ten centimeters from the edge to avoid weakening the concrete at the edge.
9. Support the pallets with treated cross beams
Adding perpendicular beams under the pallets creates a double joisting that stiffens the structure. Treated pine beams class 4 resist prolonged contact with moisture.
- Space the beams a maximum of forty centimeters apart to avoid any noticeable flexing when walking.
- Fix each pallet to the beam with two screws at each crossing point.
- Ensure that the beams themselves rest on pads or blocks, never directly on the ground.
10. Check the markings on the pallets before use

Not all pallets are suitable for terrace use. Only pallets marked HT (heat treatment) are appropriate. The MB marking (methyl bromide) indicates a chemical treatment incompatible with prolonged contact in habitable outdoor spaces.
Also check the general condition: a pallet with split crossbeams or protruding nails will not hold as a structural element. The EPAL or EUR marking indicates a standardized pallet with known dimensions, facilitating assembly and surface planning.
The strength of a pallet terrace relies on the combination of these fixations and treatments. Neglecting ventilation or hardware selection turns an economical project into a site that needs to be redone after two seasons. The markings, air gap, and surface treatments are the three checks that should never be skipped before driving in the first screw.